Back to Overview
| Back to Bending & Clamping
|Installation
Section
Making
the Doors : #1 Running the Copes
Running the Copes
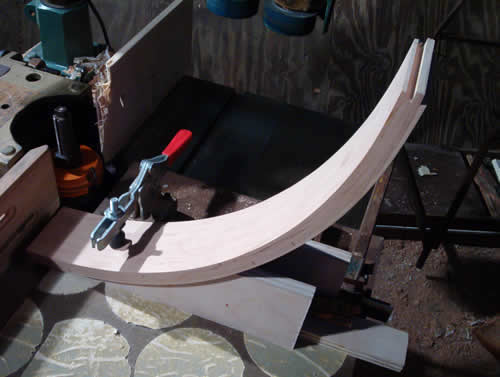
Only the first door rail cope angle was an eyeball gestimate, since all the rest were done without moving the plywood cradle above. The detail on this cope and stick set is a simple ovolo which is closely matched by a number of stock router bits. The stickyback sanding discs on the shaper cross slide are in pretty sad shape eh? Back to Top
Making the Doors : #2 Running Stiles
Running the Stiles
Before running the stiles on the shaper, I ran the radius on the face side (with knives ground to the right radius for the shaper ) to match the rails. I left the backs flat, hand planing and sanding the radius in after glue up. Plenty of extra width was available (on each stile) to adjust the shaper setup to the angle just right to meet the copes. The stile material was chosen from the closest thing I had to rift-sawed stock in my pile, to minimize movement.
It's nice to be able to climb cut the stiles on a shaper so there is no tear-out, especially when a lot of preparation went into making the stiles. Tear-out is a double no no in cases like this. Now all that's left is the sticker detail on the curved rails. This will be done with a router and a rather primitive setup, mainly because I don't know any better way to do it.. Back to Top
Making the Doors : #3 Routing Rails
Routing the Rail Stickers
A bearing couldn't be used for the panel dado, though I was able to stack two tiny bearings on the 1/4 round bit (nearly identical to the slight ovolo of the shaper cutters) as a kind of fail safe for the sticker detail. Doubling up on the bearings doubles the surface area in contact with the stock so I don't get "bearing grooves" in the wood.
The fence bolted onto the router (at the top of the photo) was enormous because I had foolishly already cut two rails to length, and a smooth entry and exit from the stock was essential. This picture shows the back rail long, though coped on both ends. Since only one end of a previously detailed edge blows out on the cope, I was able to do the remaining two rails with less chance of ruining one (or more). I'll never do that again (yeah, right).
Since I wanted no tear out with the 1/4 round cutter, I climb cut, holding the router above by hand. Clamping several rails together formed a stable base for the router and fence - which was constructed from the scraps in the pile. This process had already been practiced repeatedly in beading the face frame rails.
This was, naturally, a clinched jaw operation, and I was relieved when it was finished. Murphy must have been taking a leak at the time. Back to Top
Making the Doors : #4 Gluing Panels
Gluing The Panels
Raised Panels were glued up in the same form that glued the face frame rails and door rails. Spacing shims were required in the back on both the panel and face frame glue ups, since the door rails were thicker than either and consequently had backs with a slightly larger radius. A lot of the scrap from the original form making went to good use on this job. Yellow glue was used here rather than epoxy, for its stainless ease of use and quick set.
Assembling the face frames was also done with the aid of the glue up forms. Rails previously drilled for dowels were clamped in the forms, glued with yellow glue and stiles attached and screwed into rails from the outside edges of the stiles. An additional 2 layers of plywood was screwed and epoxied to the hidden faces of the carcass tops and bottoms to re-inforce the epoxied joint between carcass and face frame. Back to Top
Making the Doors : #5 Shaping Panels
Raising the Panels
Though it looks like a neanderthal attempt at a crossbow, this primitive fence was worth more than the scrap it was made of. I had enough crescent moon shaped plywood and cherry laying around anyway to supply the whole third army with outhouse signs.
The cutter is in a pinch collar with a bearing rub collar. The stains on the cherry are shellac from my hands and not pieces of them. Raising the end grain was the easy part of raising the panel. Trying to get the angle just right on the sides to mate with the ends was the hard part. Basically, it was a bunch of light passes through the shaper.
I don't think it's possible to have the corners bisect on a 45, and have them the same depth, and have the flat the same thickness as the end grain, and use the same knives for both. Kind of like trying to go around a corner on a rake with one miter joint. Fortunately, I had enough extra width to experiment, and I was happy with the results. Back to Top
Making the Doors : #6 Doors Fit
Doors are Rough Fit
Rough fit is complete. More details on that horror show later. Though it is not obvious from this picture, this cabinet forms a quarter circle. This means that the face frame stiles (for the moment let's consider them "door jambs) are perpendicular to each other rather than parallel like most all the other ones on earth. Also, the doors were inset into beaded face frames rather than overlaying them.
My door hanging experience, in cabinets and otherwise, might even have been a liability in dealing with these doors. Fortunately, after much whining and sniveling on my part, I had talked the customer into allowing me to use plywood for the bottom carcases.
The doors could not have been fit and hung if the backs had already been on the units. But more on this in the door hanging section.
The panels were wash coated with 1/2 lb. cut shellac then sprayed with sealer prior to glue up. Both the door and the face frame rails were constructed of the straightest grain material I had. Back to Top
End of Fabrication Section
Overview | Bending & Clamping | Installation Section
"Perfect Miters----Fast"


